Ram 1500/2500/3500: Lap/Shoulder Belt Operating Instructions
1. Enter the vehicle and close the door. Sit back and adjust the seat.
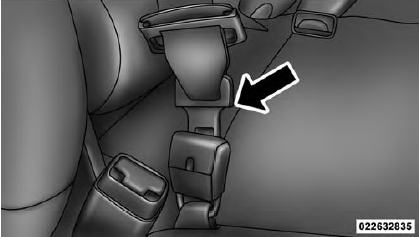
2. The seat belt latch plate is above the back of the front seat, next to your arm in the rear seat. Grasp the latch plate and pull out the belt. Slide the latch plate up the webbing as far as necessary to allow the belt to go around your lap.
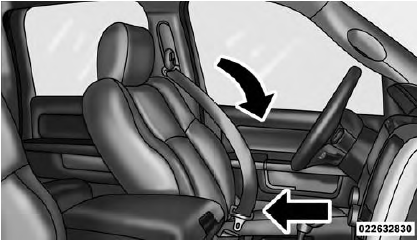
Pulling Out Latch Plate And Webbing
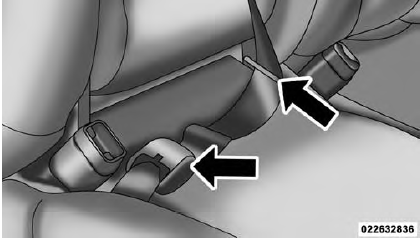
3. When the belt is long enough to fit, insert the latch plate into the buckle until you hear a "click."
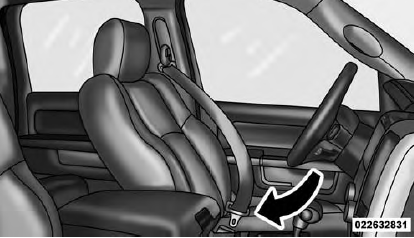
Latch Plate To Buckle
WARNING!
- A belt buckled into the wrong buckle will not
protect you properly. The lap portion could ride too
high on your body, possibly causing internal injuries.
Always buckle your belt into the buckle nearest you.
- A belt that is too loose will not protect you properly.
In a sudden stop you could move too far forward, increasing the possibility of injury. Wear your seat belt snugly.
- A belt that is worn under your arm is dangerous.
Your body could strike the inside surfaces of the vehicle in a collision, increasing head and neck injury. A belt worn under the arm can cause internal injuries. Ribs aren't as strong as shoulder bones. Wear the belt over your shoulder so that your strongest bones will take the force in a collision.
- A shoulder belt placed behind you will not protect you from injury during a collision. You are more likely to hit your head in a collision if you do not wear your shoulder belt. The lap and shoulder belt are meant to be used together.
4. Position the lap belt across your thighs, below your abdomen. To remove slack in the lap belt portion, pull up on the shoulder belt. To loosen the lap belt if it is too tight, tilt the latch plate and pull on the lap belt. A snug belt reduces the risk of sliding under the belt in a collision.
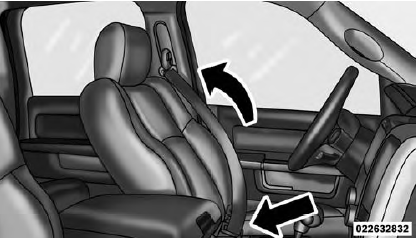
Removing Slack From Belt
WARNING!
- A lap belt worn too high can increase the risk of internal injury in a collision. The belt forces won't be at the strong hip and pelvic bones, but across your abdomen. Always wear the lap belt as low as possible and keep it snug.
- A twisted belt may not protect you properly. In a collision, it could even cut into you. Be sure the belt is straight. If you can't straighten a belt in a vehicle, take it to your authorized dealer immediately and have it fixed.
5. Position the shoulder belt on your chest so that it is comfortable and not resting on your neck. The retractor will withdraw any slack in the belt.
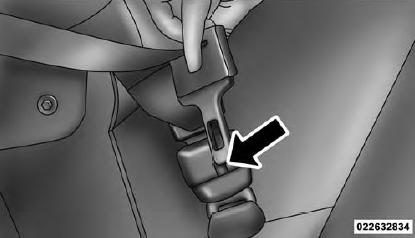
6. To release the belt, push the red button on the buckle.
The belt will automatically retract to its stowed position.
If necessary, slide the latch plate down the webbing to allow the belt to retract fully.
WARNING! A frayed or torn belt could rip apart in a collision and leave you with no protection. Inspect the belt system periodically, checking for cuts, frays, or loose parts.
Damaged parts must be replaced immediately. Do not disassemble or modify the system. Seat belt assemblies must be replaced after a collision if they have been damaged (bent retractor, torn webbing, etc.) or if the air bag deployed.
Regular Cab Front Center Three Point Belt
1. The front center seat belt on the Regular Cab may be disconnected to open up utilization of the storage areas behind the front seats. The black latch plate can be detached from the black keyed seat belt buckle located on the inboard side of the passenger seat.
Insert the seat belt tongue into the center red slot on the black buckle. The black buckle latch plate can be removed when the seat belt tongue is pressed into the buckle. Allow the retractor to take up the extra webbing, and the buckles will hang vertically from the cab back exit bezel, thus freeing up all the area behind the front seats.
Detaching Buckle With Seat Belt Tongue
2. To reattach the seat belt to the front center seat, pull the black buckle latch plate forward from the cab back panel and insert it into the black keyed buckle until there is an audible "click". For proper seat belt usage, refer "Lap/Shoulder Belt Operating Instructions".
Inserting Latch Plate
In Use Position
WARNING!
- If the black latch and black buckle are not properly connected when the seat belt is used by an occupant, the seat belt will not be able to provide proper restraint and will increase the risk of injury in a collision.
- When reattaching the black latch and black buckle, ensure the seat belt webbing is not twisted. If the webbing is twisted, follow the preceding procedure to detach the black latch and black buckle, untwist the webbing, and reattach the black latch and black buckle.
Lap/Shoulder Belt Untwisting Procedure
Use the following procedure to untwist a twisted lap/ shoulder belt.
1. Position the latch plate as close as possible to the anchor point.
2. At about 6 to 12 in (15 to 30 cm) above the latch plate, grasp and twist the belt webbing 180 degrees to create a fold that begins immediately above the latch plate.
3. Slide the latch plate upward over the folded webbing.
The folded webbing must enter the slot at the top of the latch plate.
4. Continue to slide the latch plate up until it clears the folded webbing.
READ NEXT:
 Adjustable Upper Shoulder Belt Anchorage
In the front row outboard seats, the shoulder belt can be
adjusted upward or downward to help position the belt
away from your neck. Press the button located on the
upper belt guide, and then move it
Seat Belts In Passenger Seating Positions
The seat belts in the passenger seating positions are
equipped with either a switchable Automatic Locking
Retractors (ALR) or with a Cinching Latchplate which is
used to secure a child restraint syste
Automatic Locking Retractor (ALR) Mode - If
Equipped
In this mode, the shoulder belt is automatically prelocked.
The belt will still retract to remove any slack in
the shoulder belt.
When To Use The Automatic Locking Mode
Use the Automatic Locking Mode
SEE MORE:
Air Bag Deployment Sensors And Controls
Occupant Restraint Controller (ORC)
The ORC is part of a Federally regulated safety system
required for this vehicle.
The ORC determines if deployment of the front and/or
side air bags in a frontal or side collision is required. A
central electronic ORC deploys the Advanced Front Air
Bags, SABIC ai
Automatic Dimming Mirror - If Equipped
A single ball joint mirror is provided in the vehicle. It is
a twist on mirror that has a fixed position at the windshield.
The mirror installs on the windshield button with
a counterclockwise rotation and requires no tools for
mounting. The mirror head can be adjusted up, down, left, and right for
